

Printio Connect

Launch the Printio Connect App for your ATA Photobooths printer. 
PRINTIO COnnect APP

Connect Your Printio Printer, Instantly

Printio Connect is your all-in-one web companion for managing your Printio printer. Connect, monitor print jobs, and keep your booth running smoothly — right from your browser. No app download needed.
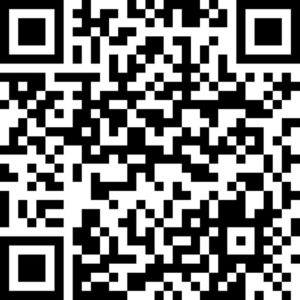
 

On Your Phone or Tablet? Scan to Open

Point your camera at the QR code below to launch the Printio Connect App directly on any device — no typing required.

3 Simple Steps

Stylized green outline of the number 01

Open the App

Scan the QR code or click the button above to launch Printio Connect in your browser.

Stylized purple outline of the number 02

Connect Your Printer

Select your Printio device and tap “Connect” to establish a link over your local network.

Stylized pink outline of the number 03

Start Printing

Monitor live print jobs, check device status, manage network settings, and keep your event running without interruption.

No software installation required

Works on any modern browser

Real-time printer status & job monitoring

Device & network management

Quick disconnect timer controls

How to Activate Your Printio Direct Wired AirPrint Module

If your Printio Direct Wired AirPrint Module is not yet activated, complete this process first. Activation connects your Printio device to its assigned serial number and allows it to function properly with your print setup.

On your Printio system, navigate to the About Page. This page contains the device information needed for activation.

On the About Page you will see an ID Code assigned to your Printio. This code is unique to your device and is required to complete activation.

Below the ID Code there is a box to enter a SerialNO. To receive yours, contact ATA Photobooths — have your ID Code ready so the team can provide the correct SerialNO for your device.

📞 Direct line: 888-530-6661

Once ATA Photobooths provides your SerialNO, enter it into the activation box on the Printio About Page. Make sure it is entered exactly as provided.

After the SerialNO is entered successfully, your Printio will be activated. It should remain active and will not need to be activated again.

Quick Summary

  • Open the About Page on your Printio system
  • Find your unique ID Code
  • Contact ATA Photobooths (888-530-6661) to request your SerialNO
  • Enter the SerialNO into the activation box
  • Confirm that the Printio is activated

How to Set Up Your Printio Module to Work with Your iPad

Follow this guide to physically connect your Printio module to your iPad and configure the network settings for printing.

What's Included in the Printio Module Kit

What You’ll Need: An iPad (USB-C or Lightning cable depending on your model) and a USB hub compatible with your iPad.
  • Plug one end of the LAN cable into the USB to LAN Adapter.
  • Connect the other end of the LAN cable to the LAN port on the Printio Module.
  • Attach your USB hub to the iPad using the appropriate cable (USB-C or Lightning).
  • Plug the USB to LAN Adapter into the USB hub.
  • Connect the power cable to the Printio Module.
  • Plug the other end into a power outlet or power strip.
  • Use the printer’s USB cable.
  • Plug the USB-A end into an available port on the Printio Module.
  • Open Settings on your iPad and verify the Ethernet connection under network settings.
  • Switch to Manual IP Configuration and enter the following:
Network Settings Table
Setting Value
IP Address 192.168.10.99
Subnet Mask 255.255.255.0
  • Open a browser on your iPad and go to printio.local.
  • Confirm the printer is recognized and correctly configured.
  • Perform a test print to verify functionality.
  • Open the photo you want to print from your gallery.
  • Tap the Share button and select Print.
  • Choose your printer and select the desired size (e.g., 4×6 or 2×6 strips).
  • Tap Print to start printing.
Troubleshooting tip: If you experience issues, check all connections are secure, confirm the iPad is recognizing the Ethernet connection, and ensure the printer driver is correctly configured.

How to Fix Common Issues on Printio

Use this guide when your printer is not detected, printio.local won’t load, or Printio is not powering on fully. Applies whether Printio is inside your booth head unit or mounted externally.

Go to Settings → Wi-Fi and look for Ethernet listed under Wi-Fi.

If missing: Unplug the USB cable from the ethernet adapter cable to the USB Hub and plug it back in firmly. Recheck on the iPad.

It is still advisable to unplug and re-plug the ethernet adapter from the USB Hub even if “Ethernet” is visible, as this may help resolve a Printio Server connection issue.

Check for the red LED on the Printio module. If it is off, power-cycle Printio:

  • Unplug USB-C power, wait 15–20 seconds, then plug back in.
  • Confirm the red LED turns on.
  • Confirm Ethernet still shows in Wi-Fi settings.
  • Open Safari or Chrome and navigate to printio.local.
  • Refresh a couple of times after the power cycle if needed.
  • When loaded and the printer appears, your booth software should also detect it.
  • Shut down iPad: Settings → General → Shut Down
  • Power off booth (unplug), wait 10 seconds, plug back in.
  • Turn iPad back on and let it fully boot.
  • Power-cycle Printio again (USB-C unplug → wait 15–20s → plug in).
  • If missing: unplug/replug USB cable from head unit.
  • If still missing: unplug head unit power briefly, then reconnect.
  • Open your app and try a test print.
  • If printio.local loads and the printer appears, you’re good to go.
Blinking green light that never turns red? You will need to replace the SD card inside the Printio (it is easily accessible). Contact ATA Photobooths Support to order a replacement SD card.
Still having issues? Contact ATA Photobooths Support for further diagnostics. 
Applies to: Flare, Alumia Pro, and external Printio setups.

How to Troubleshoot Camera Connection Issues on a Lumia iPad Photo Booth

If your Lumia iPad Photo Booth is not detecting the camera, the issue is usually related to the connection path, USB hub, camera cable, power source, or app settings. Follow the steps below to quickly resolve the setup.

Camera Data Cable USB Hub iPad

Make sure the camera connection follows the path above. Every connection must be fully plugged in and secure — a loose cable can prevent the iPad or photo booth app from detecting the camera.

  • The battery is charged, or the dummy battery is properly connected.
  • The camera does not shut off after powering on.
  • The power adapter is securely connected if using a dummy battery.
  • The camera display turns on normally.

If the camera keeps shutting off, the issue may be related to the battery, dummy battery, or power connection.

The camera cable must be a data cable, not a charging-only cable. Some USB cables only provide power and do not transfer data — if the cable is charge-only, the iPad will not detect the camera.

Try another known working data cable if available.

A quick restart can often reset the connection between the camera, hub, iPad, and photo booth app.

  • Close the photo booth app.
  • Restart the iPad.
  • Turn the camera off.
  • Disconnect the camera cable and USB hub.
  • Reconnect everything securely.
  • Turn the camera back on.
  • Reopen the photo booth app.

Make sure the USB hub is fully plugged into the iPad. If the camera still does not connect:

  • Try another USB port on the hub.
  • Make sure the hub has enough power if it requires external power.
  • Try another compatible USB hub if available.

A faulty or loose USB hub is one of the most common causes of camera connection issues.

Make sure the camera is ready to communicate with the iPad and photo booth app:

  • Camera is set to Manual mode.
  • SD card is inserted.
  • Auto power-off is turned off or extended.
  • Camera is not in playback or video mode.
  • Camera is not showing an error message.

Go to Settings → Privacy & Security → Camera and make sure your photo booth app has permission to access the camera. Also check the app’s internal camera settings to confirm the correct camera connection option is selected.

Test the setup by swapping out one component at a time:

  • Data cable
  • USB hub
  • Camera power source
  • iPad adapter, if applicable

Most Lumia iPad photo booth camera connection issues are caused by a bad data cable, loose connection, faulty USB hub, or power issue.


Quick Summary

  • Follow the correct path: Camera → Data Cable → USB Hub → iPad
  • Camera is powered on and stays on
  • Cable supports data transfer (not charge-only)
  • USB hub is working and securely connected
  • Camera settings are correct (Manual mode, SD card in, auto-off disabled)
  • Photo booth app has Camera permission on the iPad

Need Help?

Our support team is ready to assist with any Printio setup or troubleshooting questions.

0
    0
    Your Cart
    Your cart is emptyReturn to Shop