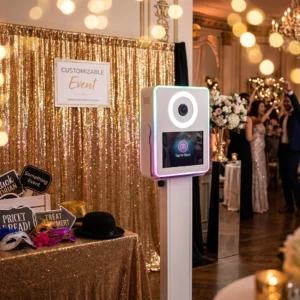
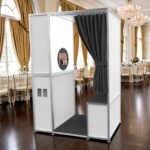
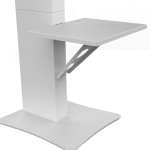
Step-by-step instructions for assembly, iPad installation, LCD setup, and direct printing. Watch the walkthrough or follow the sections below.
Model: Helio Posh
Estimated setup: 10–15 min
Skill level: Easy
Quick Navigation
1. Assembly
- Unpack the Helio Posh
- Open the travel case and remove the foam insert.
- Remove the base plate and place it with the rubber feet facing down.
- Assemble the Column
- Remove the LCD column from the case.
- Align the column to the base plate using the alignment tabs.
- Secure with the supplied knobs.
- Mount the Head Unit
- Place the head unit onto the column.
- Open the back door and tighten the head unit knobs.
- Connect the power and USB cables.
- Connect Power
- Plug in the power cable to the booth.
- Turn the main power switch ON.
- Prepare the Camera
- Unscrew the nut and remove the camera cover.
- Power on the camera, then replace the cover.
Ready to Use: Your Helio Posh is assembled and ready for operation. To pack up, reverse the steps above.
2. iPad Installation
- Insert the iPad
- Place the iPad into the enclosure.
- Press gently so it makes full contact with the Sapphire glass.
- Insert the Charging Cable
- Connect the charging cable to the iPad.
- Align and secure the cable so it doesn’t obstruct the enclosure.
- Secure with Wing Nuts
- Align the screws on all sides and attach the wing nuts.
- Tighten evenly to hold the iPad in place.
- Adjust Pressure Screws
- Tighten until there’s even, consistent resistance (prevents dead spots).
- Do not overtighten.
- Organize the Cables
- Tuck loose cable to the side to keep it out of the way.
- Feed the USB-C power cable through the designated port.
- Final Touches
- Tighten the rear locking screw.
- Test the touchscreen to confirm there are no dead spots.
3. LCD Display Setup
Resolution Tip: For a full-screen fit on the vertical LCD, use videos at 540×1920.
- Prepare the USB Drive
- Insert a USB drive into your computer.
- Create a folder named
playlist(must be exact). - Copy your video files into the
playlistfolder.
- Connect to Mini PC
- Insert the USB drive into the Mini PC USB port.
- Optional: Wireless Keyboard
- Insert the keyboard receiver into the Mini PC.
- Use it to navigate menus.
- Configure Media Dashboard
- Ensure Mini PC is connected to Ethernet or hotspot.
- On iPad: Settings > Wi-Fi > Ethernet → Manual IP:
- IP:
192.168.10.99 - Subnet:
255.255.255.0
- IP:
- Access Dashboard
- Open browser → type
at.loo. - Select your folder and click Start.
- Open browser → type
- Slideshow Settings
- Adjust transitions, colors, etc.
- Paste your photo booth gallery link if needed.
- Wi-Fi Setup
- Use keyboard to connect Mini PC to Wi-Fi if required.
4. Direct Printing Setup
- Load Media
- Install printer paper & ribbon (see printer guide).
- Connect USB & Power
- USB cable → Printer
- Power cord → Outlet
- Flare Specific
- USB → Printio port
- Power cord → Power strip
- Posh Specific
- USB → bottom port
- Power cord → Outlet
- Verify Ethernet
- Check iPad settings for Ethernet under Wi-Fi.
- Replug cables if missing.
- Test Print
- Visit
Printio.doloin browser. - Confirm printer shows (e.g. DNP 620).
- Run a test print.
- Visit
- Photo Booth Software
- Open your software (e.g. Photo Flick).
- Add printer & templates.
- Re-add printer if error appears.
Note: Always use recommended media and keep firmware/software updated.
↑ Back to topNeed help? Visit the Knowledge Base or contact our support team.